
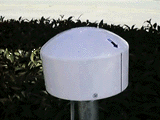
The Seismo Site is an intelligent computer peripheral that measures earth movement in the North-South and East-West planes. The system consists of an electronic sensor platform, a computer interface, computer software, and a computer cable and adapter. A housing covers the platform to protect it from the elements. The electronic sensor platform screws to a four-foot-long, 1-inch diameter water pipe. The pipe is buried vertically in the ground three feet deep, leaving one foot exposed above ground. The hole is prepared using a post hole digger, and the hole, with its pipe centered, is filled with fence post mix concrete.
Installing your Seismo Site
€ Attach the 6-foot long data cable to the interface box and to your computer serial port. Locate the interface box near a point of entry for the instrument cable. You can bring this cable through a window opening or drill a small hole for it.
€ Screw the instrument head on the pipe; tighten it and note where the N direction is; mark the pipe for the N direction, and remove the instrument head.
€ Locate a site for your seismograph that is within 30 feet of the interface box location. Double-check this distance by actually laying the cable.
€ Dig a 3-foot deep hole with a post hole digger at your chosen location. This hole should come out about eight inches in diameter.
€ Visit your local hardware store and buy a 4 foot long piece of 1 inch galvanized water pipe. Get one end of the pipe threaded. Also buy two or three 50-pound sacks of fence post mix concrete.
€ Place the water pipe vertically in the hole with the threaded end up and the N direction facing true north. (See finding true north.) Prop the post in place with three or more sticks to hold it vertical while you pour in the concrete mix.

€ Pour the dry fence post mix in the hole and add the prescribed amount of water. Walk around the pipe with a bubble level to make sure the pipe is vertical in all directions. Double check that the N direction mark is still oriented north. Let the concrete cure for a day.
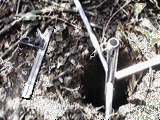
€ Screw the electronic sensor platform to the pipe. Orient the N to true north - not magnetic north. Make sure the head is tight on its mounting pipe so that it does not rattle around in the course of seismic events.
€ Run the instrument cable to your interface box.
Starting your seismograph Plug the RJ-11 telephone jack from the seismograph into the interface box plug marked "seismo". Connect the power supply jack to the interface box, and plug the power supply into a wall outlet. Your seismograph is now running. Plug the RJ-11 jack on the cable with the 9-pin D connector on the other end into the interface box plug marked "computer". Connect the 9-pin D connector to the serial port of your computer. In the event your computer's serial port has a 25-pin D connector, an adapter is provided with the Seismo Site.
The Quake Log operates on a 386 or higher IBM or compatible PC with Windows 3.1 or higher, 1MB RAM, VGA or higher graphic capabilities, and a Windows compatible mouse. It outputs to any windows-supported printer. It requires a serial I/O port set up for COM1, COM2, COM3 or COM4. The Quake Log is provided on one 3.5 inch floppy diskette. It is intended to be installed on your hard disk, and requires a minimum of 2MB available.
Installing your program
€ Start your computer and load the software provided with your Seismo Site.
€ Insert diskette in floppy drive A (or B).
€ Windows 3.1: From Program Manager, click on File, select Run, type a:\install.exe (or b:\)
€ Windows 95: From Start, click on Run, select Browse, A, click on INSTALL. It will install ready to run including its icon.
Operating modes You have a real time display and a seismic viewer with your quake log software. Use the real time display for setup to tune out local distractions as may be noticed from highways, railroad tracks or other regular ground movements that could interfere with reading the earth movements that you want to see.
Real time display Use the direction buttons (north-south and east-west) to set up your system. If your location is near a street, road or highway, click on the direction button that parallels the direction of the street and note on your screen any motion that correlates with the passing of a car. Take some time with this step. Watch the trace for a while, then click the opposite direction button for a comparison of motion in this direction.
Seismic Viewer Long term earth movement is stored in the seismic viewer. The Seismo Site stores a large amount of earth movement data in its on-board memory. The system stores data in ASCII format for compatility with databases.
Memory The Seismo Site has 8K of memory, which stores 6 minutes of earth movement. Memory can be increased in 8K increments up to 24K for storage of up to 18 minutes of movement data.
Time of day Time and date are automatically recorded with movement data .
I/O connector
The telephone-type RJ-11 connectors located on the computer interface are the RS-232 data from the seismograph to the computer serial port. The pinout is as follows:
Pin 1 - serial in (RS-232)
Pin 2 - +9 volts DC
Pin 3 - Signal ground
Pin 4, Pin 5 - Future use
Pin 6 - serial out (RS-232)
Power supply A "battery eliminator" type power supply is furnished with the system. Its power cord terminates in a male 1.5mm stereo type plug that connects to a matching connector on the interface box. It provides 9 volts DC at 200 mA, and operates any time it is plugged into a 120 volt AC wall socket.